- Home
- Fermented Food Recipes
- Decanting Red Miso Paste
Decanting Red Miso Paste, Homemade American-Style Miso
If you have arrived on this page you most likely have already made our homemade miso recipe and are now ready to open up your fermentation vessel and take a look at the end results.
Or, perhaps you are preparing to make your first batch of miso and are interested in the entire process from start to finish. Either way, here we will give a little more detail about this final phase of miso making... the exciting part!

The techniques we share come from our own American-style versions adapted from classes taken and books we've read on the subject, not from direct experience using traditional Japanese methods, which are highly advanced and perfected over many generations.
That being said, our way of making and decanting red miso paste is taken from our own personal involvement with the process as well as much trial and error since our first batch of homemade bean paste back in the 2002.
We don't typically use soybeans when fermenting miso, but rather select from other legume varieties like garbanzo bean, black bean and adzuki. These types of miso are commonly referred to as "new American miso" or "modern miso" because they are a branch off of customary Japanese variations.
However, the same procedures for making a "red miso" still apply even though different beans are utilized. A red miso is a general term used to define a longer aged paste (at least 6 months) compared to a "sweet miso" which is only aged between 4-12 weeks.
During the "decanting" phase you are basically removing your mature miso from the crock or vessel and placing it into sealed jars for storage. Below we share some of our personal experiences with this process as well as how to tell when your miso is ripe and ready.
Decanting Red Miso Paste - When to Do It
For the best natural fermentation, it is best to store your miso at a natural atmospheric temperature, such as in a basement, garage or an unheated/cooled pantry location. This allows it to develop with the natural outdoor temperature fluctuations of the seasons.
We generally recommend decanting homemade miso for at least one straight year for best flavor and health enhancing nutrients. This means that if you started it in the early spring, the following spring you would unpack and jar your cultured miso paste.
However, miso can be "harvested" after only 6 months of fermentation time. The general rule is that it should go through at least one summer before decanting. This is a time when temperatures are warmer and the lactic acid bacteria are more active.

Learn more about miso and its health-enhancing benefits.
Technically speaking, misos that have gone through a summer are called 1 year misos, even though they have only matured for 6 months or less. Usually this involves packing it in the early spring and allowing it to culture into the fall season as colder temperatures are also necessary for flavor development.
The best miso from our personal experience are the longer aged varieties. This often seems to be the case with other fermented foods and drinks, like sauerkraut, wine or cheese.
In our opinion, a fully developed miso does take some time. That's why it's good to start a new batch or two every time to decant a cultured one.
Taste Testing the Miso
When you feel intuitively like its time, or are just curious as to what it tastes like at any stage, you can always taste test it along the way. This will take some of the mystery out of the equation and you will begin to understand how flavors can change over time.
You might want to continue to ferment it for a bit
longer if:
- the flavor is too salty
- the texture it too soft
- the color is too light
A developed "red miso" will have a rich pleasant aroma and a darker color compared to when you originally packed your vessel.
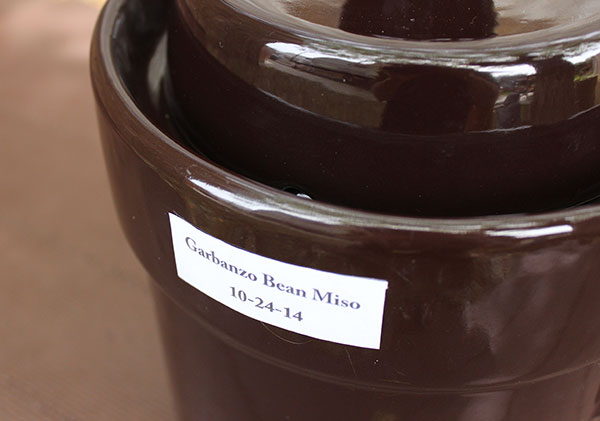
 Garbanzo Bean Miso Before Fermentation
 Garbanzo Bean Miso After Fermentation
Steps for Decanting Red Miso Paste
1) When it comes time to open up your fermentation vessel and remove
your miso, it is good to have several clean glass jars ready to store
your lovely fermented bean paste. Also, set aside several clean bowls,
one for discarding the top layer and the other for the miso.
2) Remove the cloth and lid from your crock or vessel and take out any disks or weighted objects.
3)
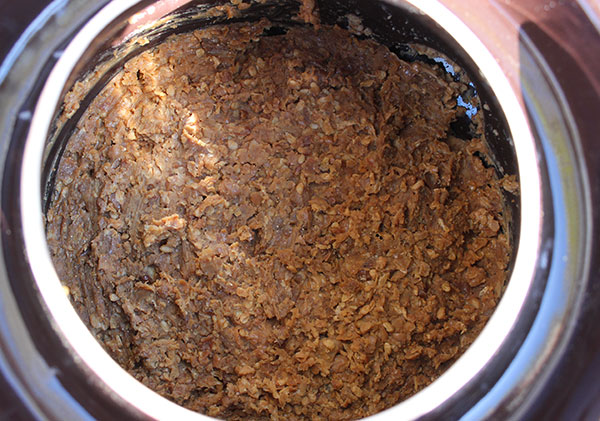
The top layer is usually not very attractive looking. Do not be alarmed
as this is very normal. Some spots of white surface mold can develop on
the top and along the sides of the jar because of air exposure. In
addition, depending on the age of the ferment it can have a wet,
sometimes slimy-looking surface texture.
4) Once you remove and discard this layer, underneath you will find a nice looking miso that has a paste-like consistency and a rich aroma like tamari. Sometimes, in fact, liquid tamari does rise to the top when making miso, especially when using a very heavy weighted object on top.
Several
times we have also experienced tamari hanging out at the bottom, top or
sides of the jar soon after it is decanted, sometimes even oozing over
the jar if it is packed to tight. This liquid is a sublime taste
adventure, very unique with a subtly sweet and amazingly rich and salty
flavor!
5) At this point, after removing this layer, we also use a clean cloth and remove any possible mold that has formed on the crock edges. This will help you to avoid it touching your paste as you remove it.
6) Again, the miso should have a pleasant smell and miso-like texture, not off-putting or slimy in nature. Remove the paste from the crock and place it into a large bowl. Generally, you will not have as much miso as you started with. This is because there is less moisture content from evaporation and fermentation process. This can cause it to condense and shrink quite a bit.
7) Remove the miso from the
vessel and place it into a large bowl. Mix it up thoroughly to evenly
distribute salt content and cultured flavors.
8) Place your cultured miso paste into glass jars with either plastic lids or metallic lids with a layer of wax paper. Metal will tend to erode when it comes into contact with the salt.
9) Store your jars in a cool, dark
location, preferably the fridge as sometimes they do tend to keep
fermenting. If this does occur pressure can build up in the jar if the
lid is tightly sealed or if the miso is packed full to the top. We have
not directly experienced this however, but understand that it can happen
so it is good to be aware.
10) Soak and wash your fermentation vessel in hot soapy water, ready for your next batch of miso.

How to Time It Right
As we mentioned, if you like to have homemade miso ready for use, it is best to start new batches soon after you decant the aged ones.
Yes, the miso making process does take time, but if you think of it this way... once you start making it, you always have some available to consume. It's really just the first batch you have to wait for.
Tips for a Miso Making Schedule:
- Decide how much you and your family consume yearly (say two gallons).
- Make your 2 gallons and wait one year.
- Decant these first 2 gallons of miso paste.
- Start your next 2 gallons soon after you've decanted the previous batch.


Cooking with Miso
The most popular way to use miso is in a soup broth or "dashi", which
typically involves simmering kombu seaweed in water with other
ingredients like shiitake, green onion and cubed tofu. The miso is
mashed into a small amount of broth liquid and then mixed into the soup
stock.
Traditionally, the paste is added at the end to water
that is below the boiling temperature to preserve the nutrient and
enzyme content.
Miso can also be used in numerous other ways in marinades, dressings, sauces or many recipes as a replacement for salt.

Visit our fermented food recipes for more on our top cultured recipes for kombucha, cultured vegetables and seed cheese in the links below.
Shop Related Products (About Affiliates & Amazon Associate Paid Links)
Affiliate Disclaimer: This section contains affiliate product links. If you make a purchase through our recommended links, we receive a small commission at no additional cost to you. Thanks for the support.


Other Related Pages


E3Live, E3Probiotics, 50 Billion, Enhanced with E3AFA

As an Amazon Associate we earn from qualifying purchases at no added cost to you.


