- Home
- Super Sprouts
- Growing Sprouts
Sprouting Seeds and Growing Sprouts for Beginners

Sprouting seeds and growing your very own sprout varieties is right up there with growing your own vegetables.
Sprouts, however, grow fast and require much less time to incubate and develop to maturity. You can grow them right in your kitchen all year round with minimum effort or expense.
The supplies are inexpensive and all you need to do is love and care for them about 2 minutes a day. Not bad, when you think about what they give in return... pounds of flavorful tiny, yet densely nutritious, sprouts!

Table of Contents
We have been growing and sprouting seeds for years and have learned a few techniques that have worked well to produce high quality, green, chlorophyll rich, luscious amazing sprouts.
It does take a little practice to get perfect looking sprouts every time, that's why we thought we'd give you a few pointers to help you out.
Over time you can learn to blend your own seed mixes to come up with your favorite combinations and taste sensations.
Also, try to introduce sprouting to your kids, most young children love the process of sprouting seeds and watching them grow. They will most likely eat them too!
How to Sprout Seeds Using Three Methods
1) Jar Sprouting

Sprouting seeds in jars is the easiest way to sprout seeds.
All you need is:
- A quart size mason jar
- A mesh or plastic sprouting lid
- Seeds for sprouting
- Pure water for soaking and rinsing
- Place sprout seeds into quart jar. (See sprouting guide for exact measurements)
- Soak the seeds overnight in 1/2 jar full of water.
- Place fine mesh sprouting lid on jar.
- Next day, rinse your seeds by turning the jar upside down into a sink.
- Fill with water and rinse again.
- Place into a bowl, plastic tub or other container that allows them to sit slanted. (See pics)
- Place into a bowl, plastic tub or other container that allows them to sit slanted. (See pics)
- Rinse them once daily.
- When they begin to grow and pack the jar densely you will need to rinse them in a bowl of water to allow hulls to float to the top.
- Discard the hulls and drain water, place sprouts gently back into the jar.
- At this point you can also replace the fine mesh screen with a more open mesh screen lid with bigger holes that allow more air to circulate.
- Begin to rinse twice daily, in morning and at night, and drain well.


Greening Your Sprouts
Many people forget to do this part, but it is important to make them as nutritious as possible. They need a bit of sunlight, not much, to turn green and fill your tiny sprout leaves with chlorophyll. (This pic was actually taken on a road trip, the perfect time to car sprout. This is what I mean by greening.)
- Place them in indirect sunlight by a windowsill to allow them to green up.
- Sprouts, depending on temperature and the seed, should be done between 3-9 days. Every type of sprout is different however.
- Keep them in a sealed jar in the refrigerator to keep them as fresh and vibrant as possible.

TIP:
Use ocean water solution when soaking your sprouts for the first time. Or, you can also purchases a high quality seaweed solution.
To make the ocean water solution place 3T of pure ocean water to 1 gallon of water.
This will give extra energy, nutrients and minerals to your seeds and they will produce greener leaves.
For more on the different varieties to "jar sprout" visit these specific sprout pages in the links at the bottom of this page.
- alfalfa sprouts
- broccoli sprouts
- onion sprouts
- mung bean sprouts
- fenugreek sprouts

2) Tray Sprouting
Tray sprouting takes a little more prep work, but yields far more sprouts because you are growing them on soil and also growing them much longer than jar sprouting.
When you grow sunflower sprouts, pea shoots, buckwheat, wheatgrass or microgreens, this is the method you will use.
You will need:
- A 21" X 10 1/2" white or black tray for sprouting.
- A black tray to cover top when incubating.
- One inch of high quality soil to cover the bottom tray.
- A spray bottle or mister.
- The sprouting seeds and pure water.
Sprouting Tray Seed:
- Soak seeds in quart jar overnight. (See sprouting guide in the link below for measurements.)
- Continue jar sprouting process as mentioned above, until the white roots begin to pop from the seed. This is when you are ready to place them on the soil.
Growing Tray Sprouts
1) Place 1-2 inches of soil into the bottom of the white or black tray.
2) Mist top of soil bed very well.
3) Drain rooted jar seeds well and place on top of the soil, spreading them out evenly.
4) Place dark lid on the top of bottom tray to incubate.
5) Allow them to sit in a darkish place until they begin to sprout and reach the tray top.
6) During this time you will mist lightly once a day.
7) Remove lid when the sprouts reach the top and place in a window sill or sunnier area. Mild direct sunlight is fine too if you want to place them outside.
8) They will grow for 3-4 more days, growing greener by the day.
9) Water the soil as needed. (You can tell by the weight of the tray how dry they are.)
10) Mist on occasion, but not too much or they will mold.
11) You will know they are ready when they are very green and densely packed together.
12) Harvest your tray sprouts with a knife or scissors.
TIPS: Poke several small holes in the black tray lid to allow to air to circulate and prevent molding. You can also add ocean water solution to the sprout tray when watering for extra nutrients. We have found they like this a lot!
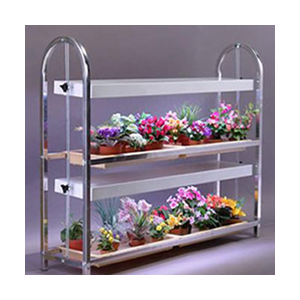
3) Sprouter Tray Sprouting
For this method, you will need a sprouter, a product designed specially for growing vertical sprouts. Although you will need to purchase one (like our favorite the stackable Sprout Garden Sprouter), you won't need to have a constant supply of soil or other growing materials.
Many microgreens, like daikon, broccoli and onion sprout, grow VERY well using this method.
For more info on using this technique visit our step by step process.
Shop Related Products (About Affiliates & Amazon Associate Paid Links)
Affiliate Disclaimer: This section contains affiliate product links. If you make a purchase through our recommended links, we receive a small commission at no additional cost to you. Thanks for the support.


Other Related Pages


As an Amazon Associate we earn from qualifying purchases at no added cost to you.

